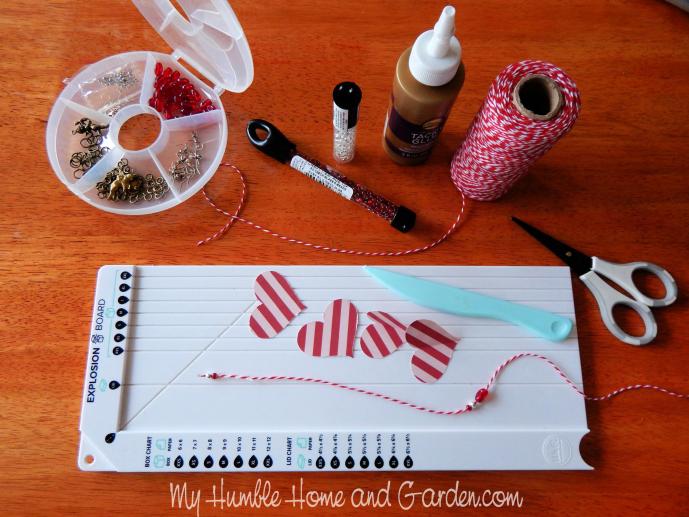
Homemade Valentine decorations are often prettier than store-bought decorations. Easy DIY hanging hearts decorated with beads and buttons are definitely some of the prettiest. I saw the idea for these beaded Valentine hearts on Pinterest and couldn’t resist making some! Here’s how you can make your own.
3-D Beaded Valentine Hearts

Supplies Needed
For this project, you will need multiple paper hearts. You can fold a piece of cardstock in half and draw half a heart on the fold, then, cut it out, and use it as a template. If you have heart templates, you can use them to draw and cut out multiple hearts. You can use your Cricut to cut out multiple hearts or use a Sizzix die cutting and embossing machine.
(We are an Amazon affiliate and may receive a small percentage of any sales through the links in this post at no cost to you. Thanks for supporting this website!)
- Decorative Valentine cardstock
- Embroidery floss or Butcher’s twine
- Scissors
- Beads and buttons
- Scoring board and Scoring tool
- Tacky glue

Valentine Hearts
I used 2 Sizzix heart dies and a heart punch for these hearts. You will need 4 Valentine hearts for each ornament.

Cut a generous piece of string to use for the hanger. Squeeze some Tacky glue on one end of the string. Use your fingers to roll and compress the end of the string. Allow a couple of minutes for the glue on the string to harden. This will make it easier to run the string through the holes in the beads.

Run the glued end of the string through bead holes and string as many beads as you like for the tail. Tie an overhand knot on the string end, apply a little dot of Tacky glue on the knot, and cut the string just below the knot.
Scoring the Hearts

Score all four of the hearts.
A scoring board makes it easy to score the Valentine hearts and fold them in half. It also makes the fold neater. The scoring board I used is for the explosion boxes. It was handy when I started this project.

Run a thin line of glue along the folded edge of one of the hearts. Lay another folded heart along the glued edge, butting the center edges together.

Hold the hearts together and lay them on a cutting mat. With your finger, remove any excess glue. Flip the hearts over and remove any excess glue on the back. Then, open up one heart and press it down firmly. Repeat with the heart on the other half.
Open up each section and make sure the center folded edges are glued but the flat sections are not glued together. Then, set the glued hearts upside down for a couple of minutes for the glue to dry while you glue the remaining two hearts, repeating the process.
Gluing the String in Place

Take one of the glued hearts and apply a thin line of glue along the seam where the hearts are glued together. Lay the string on top of the glue. Make sure the beads on the knotted end are situated where you want them to hang just below the hearts.

Apply glue to the top of the string along the center of the hearts. Fold the remaining glued hearts together and place the edge on top of the string. Then press the heart center into the glue on a flat surface.

Before the glue sets, open each section, wipe off any excess glue, and make sure the flat sections are not glued together. Make sure each section is separate like in the picture above. Let the glue dry for a minute.
Add Beads to the String and Finish

When I made the first Valentine hearts ornament, I added some beads to the top of the string before gluing the string in place. It doesn’t really matter if you add the beads before or after. I did it both ways.
Add beads, if you haven’t already, and decide how long you want the string to be. These are really lightweight, so I decided to use a simple slip knot at the top. Just make a slip knot where you want it and pull it tight. A little bead of glue on the knot will hold it in place. Trim the excess tail string.

These are adorable! They are hanging on the chandelier in the dining room and I’m making more.
Check out our Valentine mantel for this year!

Be Social!
Yes, join 47 k + followers on our Pinterest Boards, where we pin our favorite creative ideas and share ours! Follow me on Instagram, Pinterest, Bloglovin’, and Facebook so you won’t miss anything! I would love for you to share this post with your friends! They need unique ideas, too! Pin it! It only takes a second! #valentine #valentinesdayhearts #valentinesheart #hearts


