

Have you seen a split wooden ball wreath on Pinterest yet? These are so simple yet so pretty, aren’t they? Well, my vision is to create an Easter mantel display that includes one of these wood ball wreaths. Considering this project, if the floral elements are removable, I’m thinking this will be a great base to use for other wreaths, too.
So, after a little research on how to make these, I settled on the supplies below. Since I am thinking of using the base in the future, perhaps for a front door wreath, it only makes sense to use weatherproof glue instead of hot glue.
Supplies Needed For Wooden Ball Wreath

(We are an Amazon affiliate and may receive a small percentage of any sales through the links in this post at no cost to you. Thanks for supporting this website!)
- Unfinished Split Wood Balls 18Pack 2″ Diameters
- Elmer’s E7502 4-Ounce Advanced ProBond Advanced Professional Multi-Surface Bond with 100-Percent Weatherproof Glue
- 16 – inch Floral Craft Ring (I found a 16-inch ring by Ashland, which is 5/8″ thick at Michael’s in the floral department for under $10.00.)
- Decorative Ribbon
- Silk Flowers and Greenery
- Florist Wire
- Wire Cutter

The Floral Rings
There are no split wood balls like these at our local craft store and without one in hand, I picked up two flat floral rings on the shopping trip for supplies for this wreath. Fortunately, fearing that the 2″ ring would leave too much of the ring showing, I bought a thinner 5/8 – inch ring, too. You can see that the thinner ring is preferable for this project.
The ProBond Glue
This glue bonds porous and non-porous surfaces together. The surfaces should be clean, dry, and grease-free for application. The directions also suggest sanding very slick surfaces with medium sandpaper for best adhesion. Although the rounded part of the balls is polished, the flat side is a little rougher, so it doesn’t seem necessary to sand it.
After applying, the glue will set quickly. The directions say to clamp or set a heavy weight on top of the glued project and allow the glue to dry for 24 hours. I did not feel it is necessary to add weight to this project.

Controlling this glue is relatively easy. Be sure to clean up any excess glue, or drips, with a damp rag or paper towel if necessary. I am impressed with this glue!
Directions For Wooden Ball Wreath
First, you probably should consider how you will hang the wreath. A ribbon wrapped around the center beads at the top and tied is one option. You could also wrap jute twine or string in the same manner. Gluing a hanger on the back is another option. Just be sure you are using strong glue!
Then, you will probably want to protect your work surface as a precaution. This glue is really not that messy unless you over-apply it. Notice that I kept the glue toward the center of the flat part of the ring. When you press the flat ball on top of the glue, it will spread outward toward the edges. I used a piece of foam board underneath the project, which will make it easy to transfer the project to another area for the 24-hour drying time.

Applying The Glue
You want to apply the glue to the wreath form and center the bead on top of the glue on the flat wreath form. Press down firmly. This glue sets up relatively quickly, but when you set the bead in the glue, you can still move it a little to get it centered.

Before you glue the second ball, notice that there is a definite grain to the round tops. Decide how you want the balls to be placed on the form. I chose to change the direction of the grain as each ball is placed in the glue.
Then, apply more glue next to the first bead, butt the bead up against the other, and center on the wreath form.
At this point, I realized it was a little difficult to tell if the ball was centered. My first thought is to draw a circle on the foam board slightly bigger than the wreath form and use it as a guide.
Tip For Placing The Balls On The Wooden Ball Wreath
Then, I remembered the other wreath form is slightly bigger. Set underneath the thinner wreath form, it is much easier to eyeball and position the balls about 1/2-inch from the outer edge. As I said, drawing out a larger circle will serve the same purpose.

Repeat until all of the beads are glued to the wreath.

For this wreath, I used all of the 18 split wooden beads that came from the link above at Amazon, leaving an empty space for the ribbon bow and the silk flowers. If you like, you can order two sets of these and cover the entire wreath form.
Then, I allowed the beads to dry overnight.
Adding The Flowers And The Ribbon Bow To The Wooden Bead Wreath
Laying out your greenery, flowers, and a bow is the next step. This is just to get an idea of how you want to compose the flowers and where you want to place the bow.
Greenery will cover up the bare frame, disguising the lack of wooden balls there. But, notice in the pictures below how adding more textural greenery fills in and makes the arrangement so much more interesting.

You may recognize the ribbon is the same as the ribbon used for the ribbon wreath I made last year. As I was gluing the balls onto the wreath form, this leftover ribbon came to mind. The light stripe in the ribbon mimics the color of the wooden balls.

Although you can use hot glue to attach the greenery and flowers, attaching these with florist wire makes it easy to remove and change out for other seasonal options throughout the year.
Attaching The Greenery And Flowers To The Wreath Form

First, place two of the fern fronds on the wreath form with the tips facing opposite directions. Wrap wire between the leaves of the fern. Add a third frond over the others and catch it in the wire as you wrap the first two. You can add more if you like. I think three is sufficient.
Positioning The Bow

I went back and forth on whether to place the bow in the middle or on the right side of the wreath. Ultimately, the right side won. Notice that the bow is just eight loops wired together in the center. Then, I took another piece of ribbon, formed a loop, and tied it to the wreath form.
Attaching The Flower Stems

Next, I think it is easiest to wire a couple of the floral stems together. You can manipulate the flower heads and curve the stems to mimic the curve of the wreath form. Then, just wire them to the wreath form. I wired the three together facing the left and two together facing the right of the wreath.
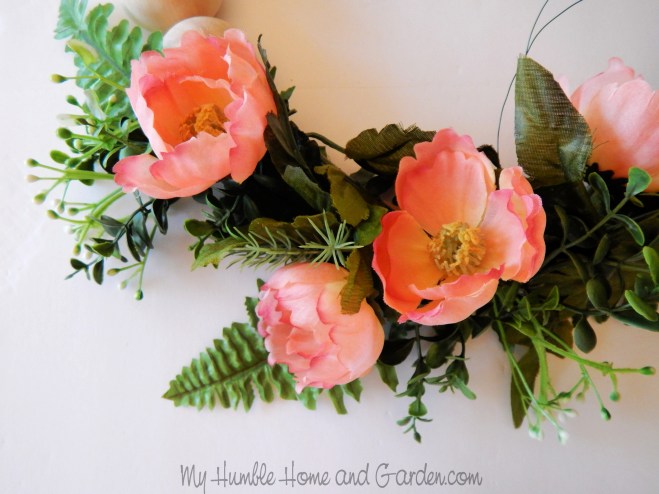
These old-fashioned roses and the greenery are all from previous projects. Usually, when you buy silk flowers, the stems are unnatural, straight, and stiff. Bend the ends of the stems by the flowerheads to change the direction they face to fit your needs and look more organic. Bend the stems to follow the contour of the flat frame.
Attach the stems to the wreath form on top of the fern fronds.

The greenery above is a section of garland. Little snippets of the garland add texture to the wreath.
When you cut and secure the ends of the wire, be sure to bend the wires to the front. You don’t want to scratch your door or wall with the wire ends. The ends can be hidden underneath the greenery.

Notice the vine that is woven throughout the greenery, too. The different shapes, colors, and textures of the greenery add interest. Fortunately, all of the silk flowers and greenery used for this wreath are leftovers from other projects!

Hope this inspires you to make your own wooden ball wreath! I love it!
Spring Wreaths

DIY Striped Ribbon Wreath – Beautiful, Quick, and Easy

DIY Spring Wreath Ideas With Tips and How To

DIY Spring Wreath – You’ll Love How Easy It Is
Click through for step-by-step directions for crafting more spring wreaths.
Be Social!
Follow me on Instagram, Pinterest, and Facebook so you won’t miss anything! I would love for you to share this post with your friends! They need amazing ideas, too! Pin it! It only takes a second!

I like it, it looks nice! Thanks so much for linking up with me at the Unlimited Monthly Link Party 22. Shared!
Thank you, Dee!
Visiting again to say thanks so much for linking up with me at A Themed Linkup 48 for Crafts and DIY. Pinned!
Thanks again, Dee!
CONGRATS! Your post is FEATURED at A Themed Linkup 49 for All Things Crochet from my previous linkup for Crafts and DIY.
Thank you, Dee! That’s a nice surprise this morning!